It’s no secret, I’m a big fan of SharePoint Online. As the SharePoint Developer here at Bit-Wizards I get to work in all different versions of SharePoint for our clients, even going all the way back to SharePoint Team Services from the early 2000’s (Yikes!). Remember the Microsoft FrontPage WYSIWYG HTML editor? Amazingly, that’s where SharePoint got its humble beginnings, but SharePoint Online is the mature culmination of over a decade’s innovation and evolution for the platform and is by far my preferred version of SharePoint. And so, as part of my job, I get to help our clients migrate their outdated, on premise SharePoint farms into Office 365. In fact, SharePoint Online is one of the biggest and best features bundled with Office 365 subscriptions. Considering an Office 365 subscription can be had for just a few dollars a month it is an amazing value, and you don’t have to worry about purchasing, maintaining and upgrading a slew of servers to power SharePoint. Thanks, Microsoft! In a previous blog post, I showed how to get started with the process of migrating from SharePoint 2010 to SharePoint Online. In this blog post, I’m going to fast forward past moving everything to SharePoint Online and focus on smoothly transitioning your users to using Office 365 as the corporate intranet.
Prepare the Users
The most important thing to remember when decommissioning your SharePoint 2010 server is that making the transition smooth for your end users is more important than figuring out the technical difficulties! We humans—as a species—tend to not like change. We especially don’t like sudden change, so stretching out the switchover is a good idea. So prepare your users by getting them excited about the new features they’re going to enjoy (like the whole suite of Office Web Apps!), and showing them how to get around in the new portal. I highly recommend that, at a minimum, you put together a user guide for your company’s SharePoint Online intranet.
User Guide
This is actually pretty easy to put together. Even though I have a background in Graphic Design, I typically just use PowerPoint to put this together since there are lots of themes to choose from, and it’s easy to place images and text wherever you need them on the page. Divide up SharePoint into logical sections; e.g. Logging in, Navigating the site, Using search, Accessing calendars, Document storage, etc. Then take screen shots of all these sections, and paste them into your PowerPoint file with brief, one-paragraph descriptions and bullet lists. This task doesn’t need to be a novel! Just a quick-reference guide to put your users at ease as they transition to the new site. You can then export this to a PDF, and link to it on the homepage of your current SharePoint 2010 site.
Video Walkthrough
Additionally, to make things even easier, you can make a video walkthrough. I know this sounds daunting, but it’s actually super easy to put together, and makes the transition even easier. Using a screen recording utility, simply go through all the sections from your PowerPoint/PDF and explain it while you go along. This video only needs to be a few minutes long.
Site-Wide Notification
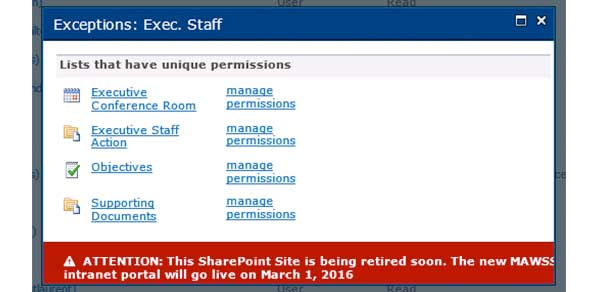
One last step you should do is to create a site-wide notification in your existing SharePoint to warn users that the transition to SharePoint Online will take place on a specific date. You’ll need to use SharePoint Designer to accomplish this, but it’s not hard to edit your master template, and with some creative CSS usage, you can create a persistent notification window that sits at the bottom of every page in SharePoint 2010. A word of warning; make sure the code you use for this is compatible with older versions of Internet Explorer, because many SharePoint 2010 users will be using older browsers.
Pull The Trigger
Okay, so you’ve given your users plenty of notice, and prepared them for the changeover, and the big day has arrived. Make sure all your user guides (PDF and Video) are also available in SharePoint Online, and featured prominently. Be aware that even the best laid plans will have unforeseen hiccups after transition, so you and your IT team will need to be ready to field questions and issues during the initial move. But now it’s time to pull the trigger, and go live with the new site. Here are the steps you’ll need to take:
Set Permissions to Read Only
Instead of just kicking everyone off, in the interest of making the transition smooth, we’re going to keep the old site live for a week. However, we
do not want our users to continue using the site. It’s merely there for comfort, so that the users can follow old bookmarks and favorites, or look up information where they know it is, but then find that information on the new site. The easiest way to do this is to set everybody’s permissions to read only, except for the admins who know NOT to add any content to the old site. Now when your users end up back in SharePoint 2010, they can view existing content, but not edit or add anything.
Change the Notification
Now we head back into SharePoint Designer. Change the existing site-wide notification from the previous step. Make it more prominent, and inform the users to go to SharePoint Online, and provide a link to the new site.
Set a Page Redirect
This step isn’t necessary, but I like to use this trick to encourage a fast migration to SharePoint Online. Back in SharePoint Designer, we can add an HTTP Header redirect users to the new site. I put a 30-second timer on it, so the user has time to redirect themselves before the page redirects them automatically. The code goes in the
<head>…</head> section, and will look something like this:
<META http-equiv="refresh" content="30;URL=https://yourtenant.sharepoint.com">
Shut it Down
And finally, it’s time to shut down access to the old SharePoint 2010 site. All your users should have been comfortably using the new site for a week now. So it’s time to take the final step and decommission the 2010 farm.
Revoke all Permissions
In the previous step we allowed our users to view the old site, but now we’re going to completely remove their permissions so they can no longer access the site. In the site settings go to permissions and remove everyone except your admins.
Back it Up
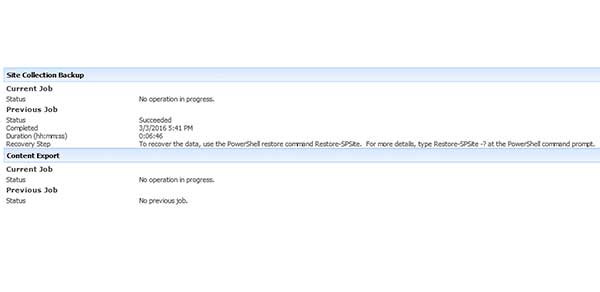
Even though we’re not planning on ever regressing back to SharePoint 2010, it’s still a
really good idea to back everything up before shutting it down for good. You’ll need either a hard drive or a network location to back everything up. You’ll perform the backup inside of Central Administration in your SharePoint Farm.
Shut it Down
And finally, it’s time to shut it all down. There’s no reason to leave your servers on the network taking up resources. Unlike SharePoint 2007, SharePoint 2010 doesn’t have an option in Central Administration to quiesce the server farm, so you’ll have to do it in
PowerShell:
Really Shut it Down Now
And finally, it’s time to shut it all down. There’s no reason to leave your servers on the network taking up resources. Unlike SharePoint 2007, SharePoint 2010 doesn’t have an option in Central Administration to quiesce the server farm, so you’ll have to do it in
PowerShell:
stsadm -o quiescefarm -maxduration minutes
Get Help!
These blog posts give you a decent overview of some of the steps necessary for migrating from SharePoint 2010, to SharePoint Online. If you’re still running SharePoint 2010 it’s time to upgrade!